Brand & Customize
Configuration
Coming soon.
Use custom fonts
When using the Brand & Customize add-on you have the option to choose between different fonts. Ideally, you should select a font, that comes close to the font you use in your own branding.
1. Use a standard font
In the current version of Brand & Customize we decided to make the most common fonts available as options to choose from. Almost everyone should be able to see these fonts. A small minority will see fall back fonts. Those are decided by the user’s browser and/or operating system.
2. Use a custom/external font
With this method you can add custom fonts, by using either Google Fonts or Adobe Fonts (Typekit).
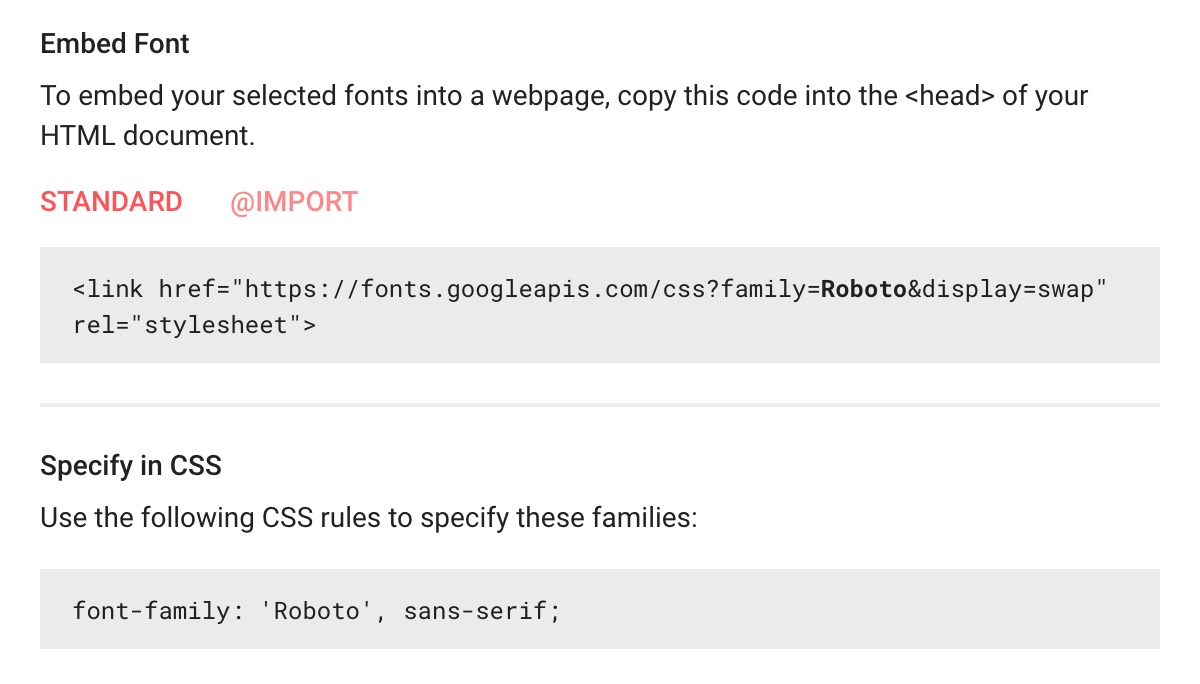
Example, using “Ubuntu” provided by Google Fonts:
Get the embed code from Google:
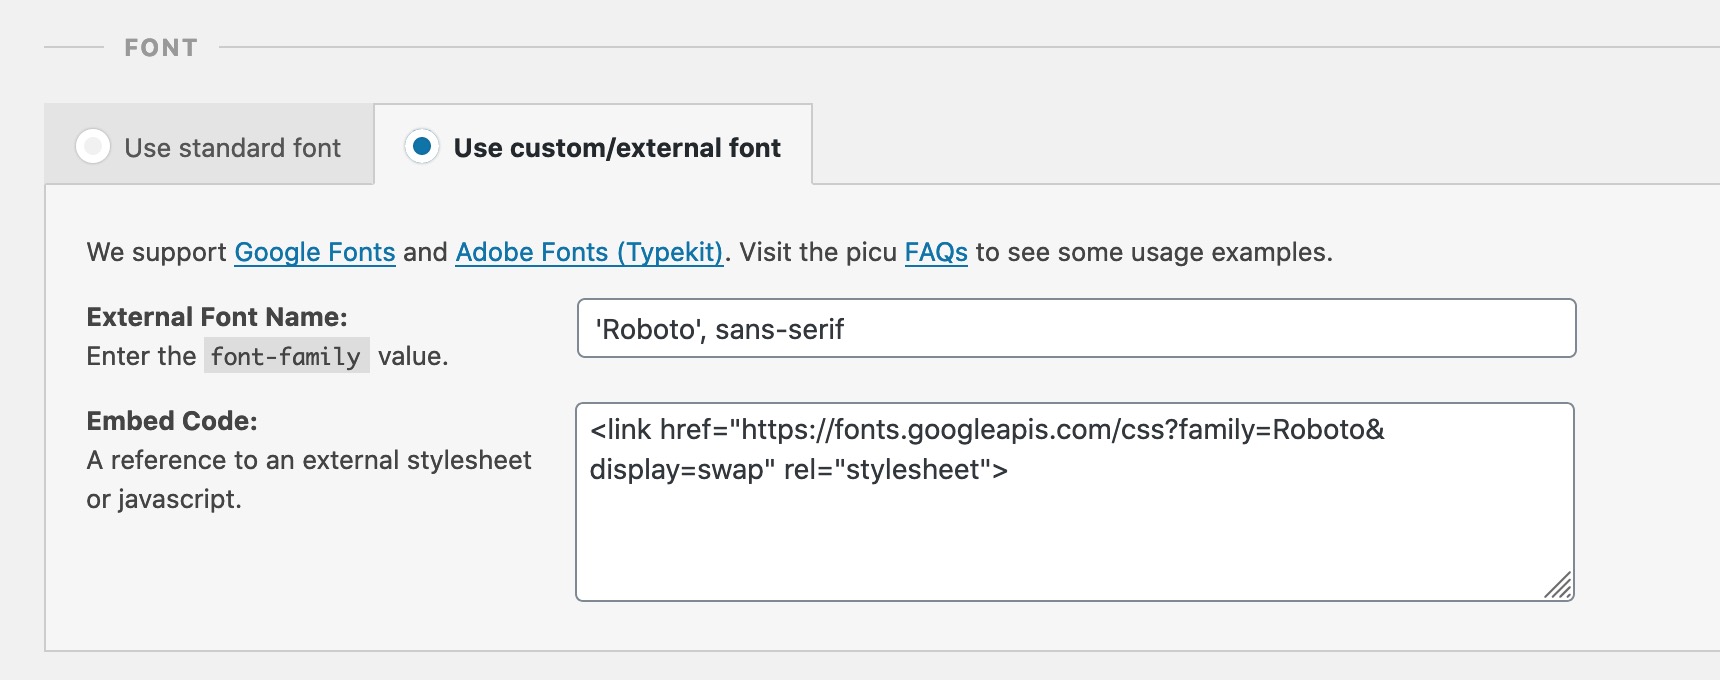
Paste the code into the corresponding fields in the Brand & Customize settings:
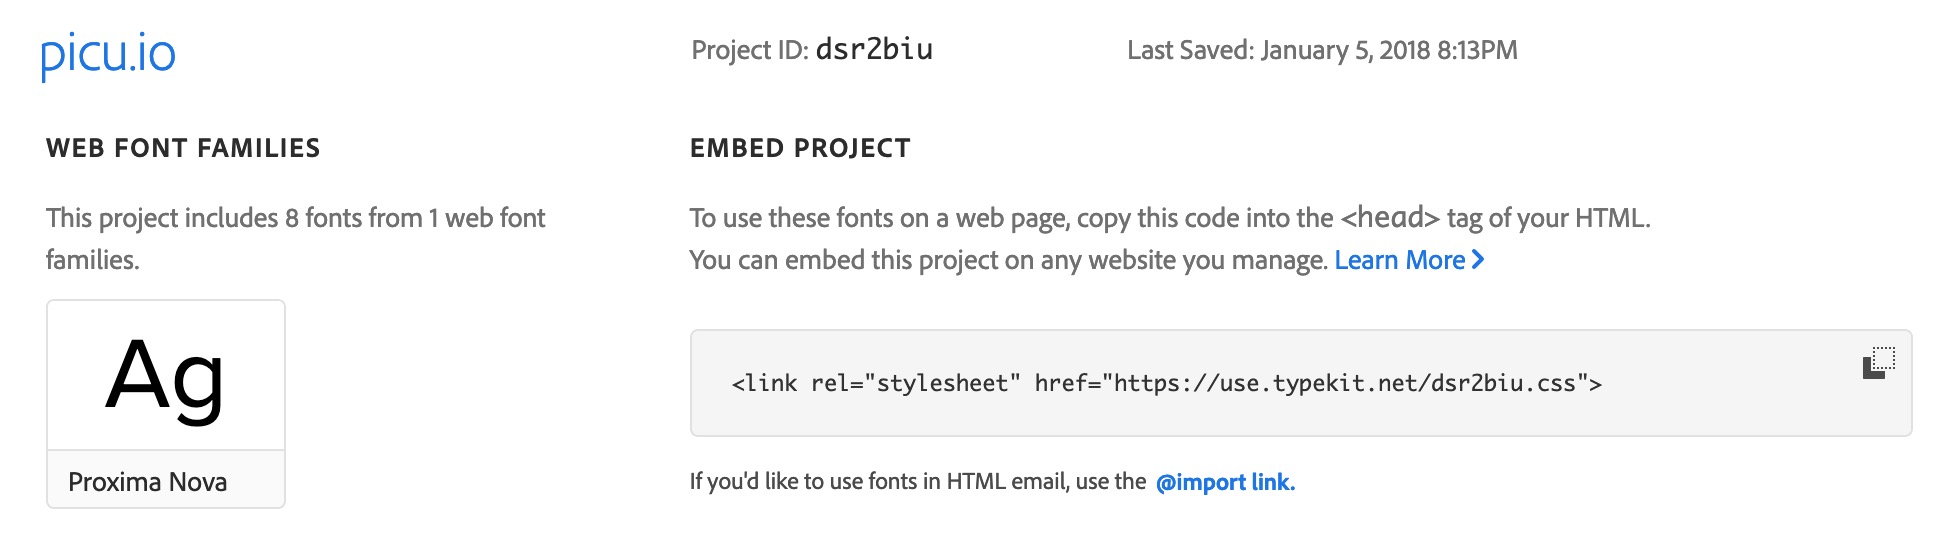
Example, using “Futura” provided by Typekit:
Get the embed code from Typekit:
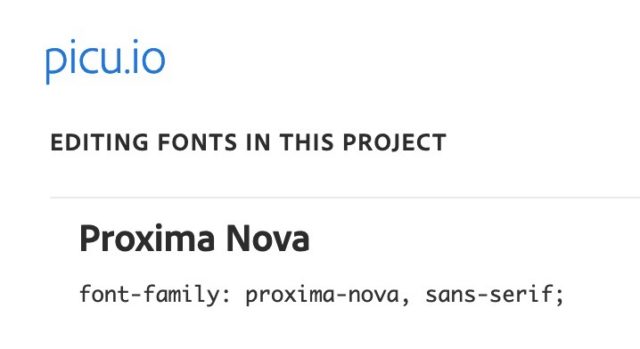
Paste the code into the corresponding fields in the Brand & Customize settings:

Still having issues?
In your WordPress Admin go to picu > Settings > Debug Info and send the contents of this page and your questions to support@picu.io.