With over 22% of all online searches being for images, it’s safe to say that you will want your photography website to rank high in the relevant search results pages.
Image optimization, or image SEO (search engine optimization) is the process of making it easier for the search engines to understand what images you have on your website, where they are, and what subjects they feature.
The better you optimize your images, the better search engines such as Google and Bing understand your photography site content, and the better the chance of your images being shown to potential clients.
Ideally, you want to optimize and prepare your images before uploading them to your site. This way, you don’t have to worry about the performance of your website as it grows. Both search engine crawlers and people will have an easier time accessing image-based content on your site, and you’ll be able to ensure a seamless browsing experience.
In this article, we’ll cover some important tips you can use to optimize your images for the web and enhance the user experience on your site, especially if you upload lots of image-based content.
Why You Should Optimize Images for the Web
Since images take more resources and contribute more to the overall page size, optimizing them is essential for ensuring good website performance.
Let’s quickly go over some of the benefits of optimizing images on your website:
- Improve website performance. Optimizing images when you upload them to your site can help enhance the performance of your website. This is because you’re essentially reducing the file size of images which makes it easier for the data server to deliver images to site visitors quickly. Larger file sizes and unoptimized images can cause your website to slow down and negatively impact the image SEO of your site – as well as the experience of your visitors.
- Enhanced user experience. With a better-performing website, you can offer a more seamless browsing experience, even if your website mostly contains bulky elements such as images and videos. Site visitors can access your content, and you don’t have to worry about images not loading or loading slowly for some site visitors, especially mobile users. A more responsive and optimized website not only helps you rank your content better in search engine results but can also help you drive more people to your website.
- Better ranking in SERPs. A better ranking in SERPs is essential if you want to promote your content to reach a wider audience. If your images are optimized for the internet, Google and other popular search engines will rank your web pages higher in users’ search engine results. This will not only increase traffic to your website but also help search engine crawlers easily access your content and display it higher in relevant SERPs.
Tips for Preparing Images for the Web
Let’s now dive in to explore the specific steps you should take to fully optimize your images for the web.
#1. Choose the Correct Image Format
First, you need to choose the right image format.
Start by considering your use case for the image you want to upload. For example, are you uploading product images to your blog post, or showcasing your skills as a wedding photographer? You need to select the right format or, in other words, the format that works best for your specific use case.
There are two main formats to choose from, and one new kid on the block that could be a sound choice when uploading images to the web.
JPEG
The JPEG image format is widely used around the web as it gives you the ability to adjust the quality level of your images. This essentially means you can find the right balance between quality and file size. JPEG image format is mostly used for uploading photographs and higher-quality images that you don’t want to load slower due to larger file sizes. However, you also don’t want to lower the quality so much that it’s obvious to see in your uploaded image.
PNG
PNG images are used for higher-quality images, but they also result in higher file sizes than JPEG. They are perfect for logos (as PNG supports alpha transparency layers) or if you want to upload clipart to your site. However, it’s important to note that uploading your photos in PNG format can result in a very large file size. This may mean that your images will load slower for site visitors, resulting in longer wait times before the user gets to see content when they land on your website. As a result, it can cause a poor user experience and potentially cause new site visitors to bounce off your site when they don’t see images load after a couple of seconds.
WebP
WebP is the “new kid on the block” (although it has been around since 2010!). It’s essentially a compressed image format that is much superior in compressing images compared to JPEG format. With WebP images, you can create smaller image files with little to no visible quality loss. This is great for uploading photos to the web and ensuring your content loads quickly on your site. However, it’s important to implement the WebP image format correctly with a fallback for browsers that do not support it yet. There are many plugins to help you implement WebP image format functionality on your site.
#2. Compress Image Size
Once you have decided on the most appropriate image format to use, the next consideration is the compression ratio of the images. This means how much the image should be compressed. Generally the more an image is compressed, the more data is lost, but the smaller the file size.
Using JPEG image format to compress images is a great idea as JPEG images support lossy compression. This effectively means that some data from the image is removed permanently, and cannot be restored. However, this is done in such a way as to be largely undetectable to the eye, at least at lower compression ratios.
For example, you may have a blue sky that looks very much as though it’s only two or three shades of blue, but which may be several hundred different shades. The algorithm will reduce the number of different colors used, which will save a great deal of data, but the reduction in shades of blue from 300 to 100 will make very little difference. Of course, the higher the amount of compression the more loss occurs, and eventually it will become noticeable.
You’ll also need to bear in mind that not all images will need the same image compression settings.
Depending on the content in your images, some images will tolerate more compression without affecting image quality. For instance, smooth gradients in the sky can get messy quickly if you reduce image size too much.
It’s pretty simple: the lower the image file size you upload, the quicker it will load for your site visitors.
#3. Resize the Dimensions of Images
In addition to compressing images it is also recommended to resize images for the actual size they will be displayed as on your website. Uploading huge images that will only be viewed as a few centimeters across is simply a waste of data. By resizing images to the correct size, you’re reducing page loading times not only because the file size is smaller, but also because the browser doesn’t have to calculate how to reduce the image size to fit within the area of the page it should be displayed in.
Similarly, you can also crop images and remove extra detail from images, which is useful for creating product thumbnails, as smaller image sizes help load product images quicker and better.
Additionally, depending on the theme you use on your site, WordPress compresses and crops the images you upload by default.
For more information about resizing image dimensions in WordPress, check out our detailed guide on how to change image sizes in WordPress.
#4. Use an Image Optimization Plugin
You can also use an image optimization plugin for your WordPress site to enhance images before uploading them to your site.
Some popular examples of reliable and effective image optimization plugins include:
EWWW Optimizer

EWWW Optimizer is a simple WordPress image optimization plugin that lets you automatically enhance any existing images on your site, as well as new image uploads.
You have access to easy-to-use tools that let you optimize everything image-related on your site with a click of a few buttons. For a better idea of what plugins to use for your photography WordPress site, check out our roundup post of the best WordPress plugins for photographers.
Imagify Image Optimizer
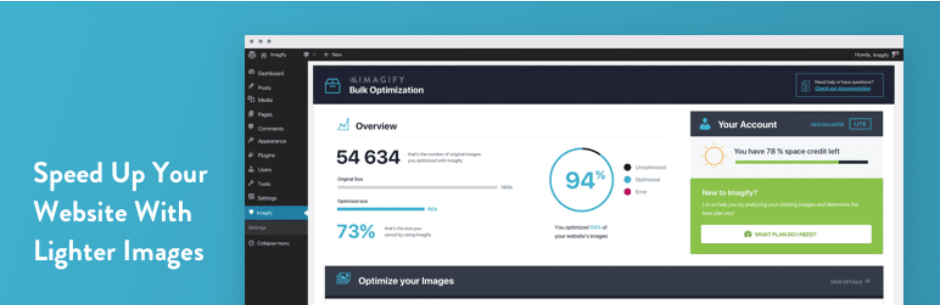
Imagify offers a “one-click” solution for optimizing images on your website.
Once you install and enable the plugin on your site, it automatically starts to optimize all images present on your website, including new image uploads for the future. It’s a great way to quickly optimize images on your website, without having to put in much effort and time.
Optimole
Optimole is an all-in-one solution for easy image optimization in WordPress.
It offers a more “hands-off” approach to image optimization as all you really need to do is install the plugin and let it do the work. It automatically compresses and optimizes the images on your website. As a result, you ensure stable website performance and an enhanced user experience on your site.
Optimus Image Optimizer

Optimus Image Optimizer is a robust tool designed to help you automate the image optimization process on your website.
The plugin lets you optimize your image and reduce the file size of images during the upload process, without having to touch a single line of code. In addition to this, it also supports images in the WebP format and lets you optimize image thumbnails on your WordPress site.
WP Smush

WP Smush offers an all-in-one solution for preparing images for the web or optimizing images before you upload them to your site.
It lets you compress images without degrading the visual quality, which helps improve website performance. As a result, your site’s web pages will load faster and make it easier for both people and search engine crawlers to find your content.
Conclusion
Optimizing images before uploading them to the web is important. Popular search engines such as Google, Yahoo, or Bing all rank web pages with optimized images higher in the SERPs.
It’s essential to optimize your images on your website so that they don’t negatively impact the performance of your website, the experience of your visitors, and the effectiveness of your image SEO.
Always remember to choose the correct image format according to the content in your image and your use case. It’s also strongly advised to resize and compress your images before uploading them to your site. In addition to this, you can use intuitive image optimization plugins for WordPress to automate the image optimization process.
Do you have any other image optimization tips you’d like to share? Leave a comment below.